Java Lab 1 -- Mastering the IDE for java
To do this assignment, I would suggest that you try the lab machines
first
before installing Java
JDK and Eclipse on your personal machine.
We will do much of the first couple of assignments in class.
When you are comfortable with Java and Eclipse, then attempt to using
your own machine} If you want to configure your personal machine to be
similar to what is available in the labs, you may need to install and
download the following before creating the project.
- (Typically not necessary on a Mac, as Mac OS X ``comes complete
with a fully configured and ready-to-use Java runtime and development
environment".)
- Install the Java Development Kit (JDK
6 Update 27) from {http://www.oracle.com/technetwork/java/javase/downloads/index.html}
- Install Eclipse. Download it from {http://www.eclipse.org/downloads/packages/release/helios/sr1}
where I would suggest picking Eclipse Classic 3.6.1. (Version 3.6 is
installed on the lab machines on campus. There are other versions with
minor differences; if you have a preference, use the version you
prefer.)
Following the directions for comppiling and runnign a program.
For practice, do the Hello project as in the example in the Eclipse
tutorial.. Eclipse
is an icon on the Lab Application tool bar. Click on it to bring up the
IDE (interactive development environment).
Lab1 -- Make a project called FirstOne
Step 1 Launch Eclipse.
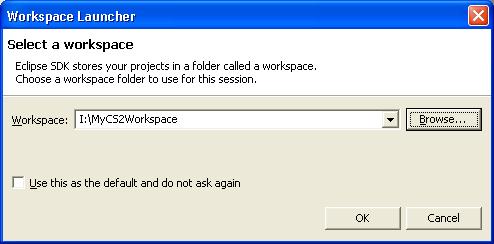
Step 2 Make a workspace on your USB stick. On my
computer at home, my memory stick was in the I: drive. This will vary from
computer to computer.
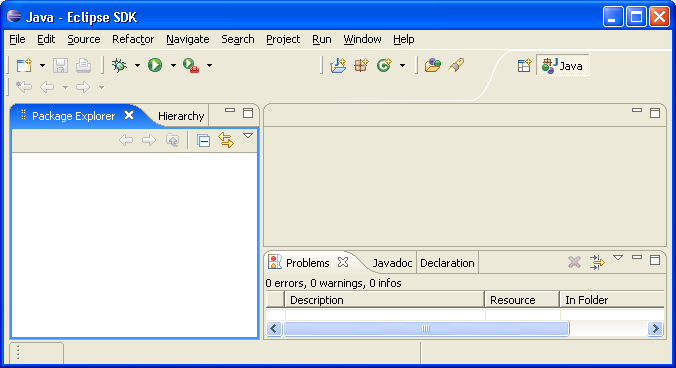
If the Welcome to Eclipse
window appears, close it. You should see a window similar to this:
Step 3 Select File>New>Project
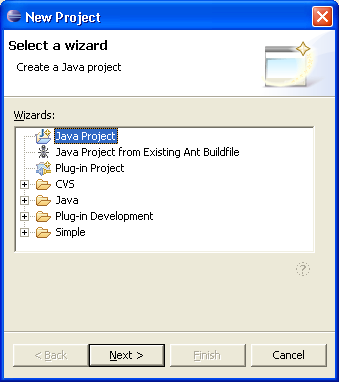
Step 4 Click next. Make a new project on
your usb stick called Lab1.
In the lab, that project should go on your memory stick. You should
alsways keep a copy on your hard drive in the dorm. As you type in the
name Lab1 you will see it also
appear in the shaded contents box in the window
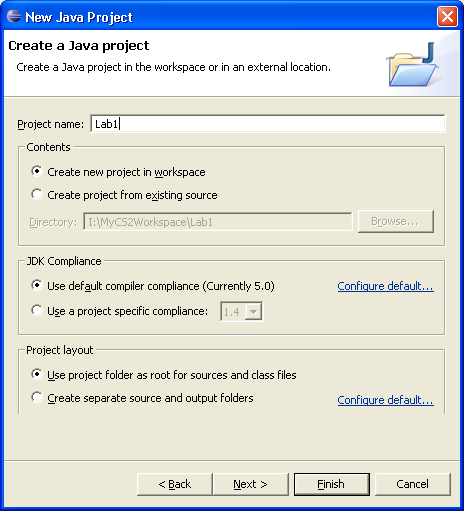
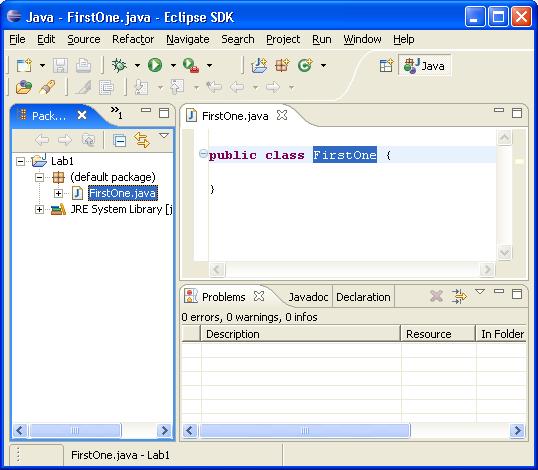
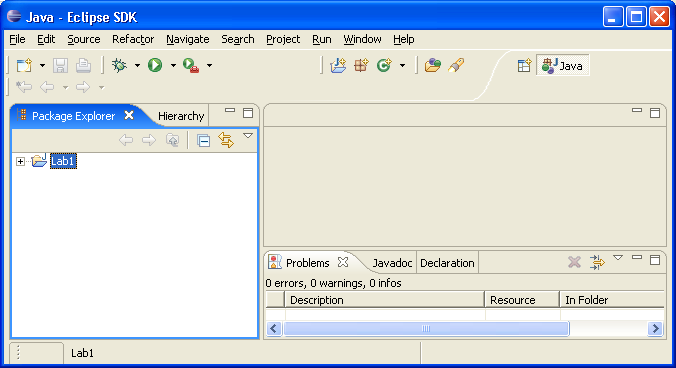
Step 5. Click finish.
You should see:
B. This is #2 in the Short Intro to Eclipse -- Make a file
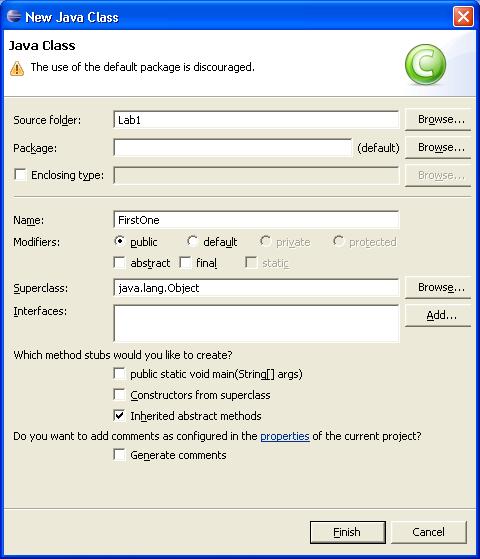
Step 1 Select New>Class from the File menu. For this assignment give
it the name FirstOne. You
may see a warning that the use of the default package is discouraged.
Don't worry about it. Then click finish.
You should see a screen similar to this one:
Step 2. Enter the following code, making the changes
appropriate for you! Note that you
need to get rid of the code that
Eclipse supplied for you, if any.
import java.io.*;
/***************************************************************
* Filename: FirstOne.java
* Author: Your name and your section (CS0-
02 or 01 F06)
* Date: Today's date
* Version: 1.0
* Description: A Java version of hello
*****************************************************************/
class FirstOne
{
public static void main (String[] arg)
{
System.out.println("This will be my first Java Program");
}
}
C. Fix anything wrong
You may see problems in the problem window. Remove the errors,
and the save the file again. Note that I have deliberately put an
error in the text!
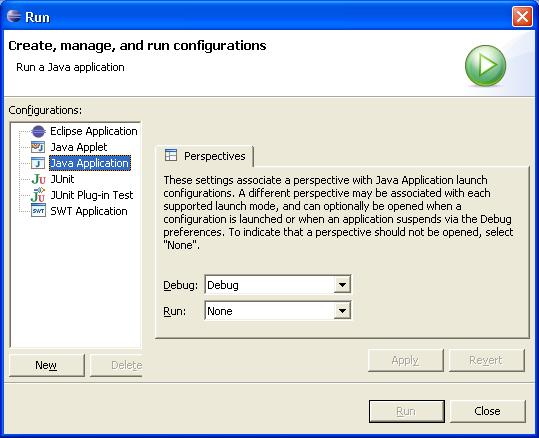
D. Running
. 1. First time you run only.) From the Run menu select Application
and the project should be the current project (Lab1)
Highlight Java Application
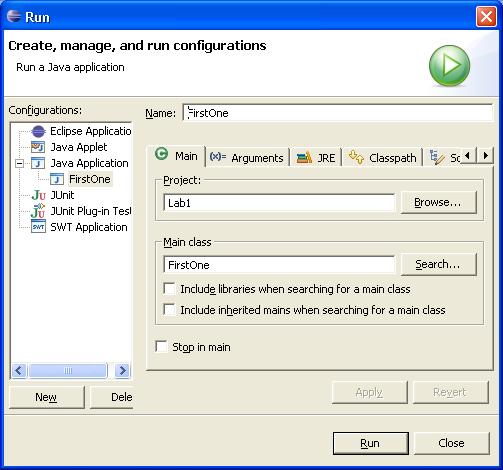
- You may have to search for the main class -- its name is the
name of the class file that has in it "public static void main"
In this part it is FirstOne
Click the Run buttom on the
bottom of the window
- You should now see

F. Printout of the successful run
Step 1: With the
window above open, simultaneously hold down
the alt key and the PrintScreen key
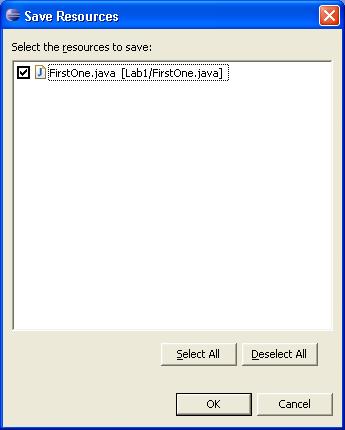
Step 2: Do NOT close
Eclipse, but open up Word or another word processor
Step 3: File>Paste and
the screen will appear on your docoument
Step 4: Insert
your file with the java code -- in this case, FirstOne.java.
Insert menu -- file
Look in: -- Select your flash drive:,
and the Lab1
folder -- probably in your workspace folder
Files of type: -- select all files (*.*)
Select -- FirstOne.java
Click on -- OK -- you should see
your Java program below the screen!
Step 5: Save the word
document on your memory stick in the folder with the code for this
project. Name is something like Lab1.doc
Step 6: Close all projects open in
Eclipse. Use the icon on the bottom of the screen to safely eject
your usb memory stick.
Hand in
- The printout as in Step F ..
- Include the picture from the run.
- Repeat these steps for the dollars to euros program in the text
, including the prinf() statement on p. 235. Be sure you have put
in comments in the style as in tep 2 but which reflect the
dollars/euros program.